Blog

  • KTU-S7-CSE_CD-Lab

    KTU-S7-CSE_CD-Lab

    This repository contains all programs for Compiler Lab of 7th semester CSE in KTU 2019 Scheme.

    The syllabus is provided in this repo.

    All of the programs are run on linux ; for windows the process may differ

    List of Exercises/Experiments :

    1. To Implement a lexical analyzer in C.
    2. To write a program for implementing a Lexical analyser using LEX tool
    3. LEX Program to count the number of lines and number of characters in an input.
    4. LEX Program to remove space, tab or newline
    5. Generate a YACC specification to recognize a valid identifier which starts with a letter followed by any number of letters or digits.
    6. LEX Program to count the number of vowels and consonants
    7. Generate a YACC specification to recognize a valid arithmetic expression that uses operators +, – , *,/ and parenthesis.
    1. Implementation of Calculator using LEX and YACC
    2. Write a LEX Program to convert the substring abc to ABC from the given input string
    3. Implementation of DFA
    4. Implementation of Top down Parser (Recursive descent parser)
    5. Simulation of code optimization techniques
    6. Implement intermediate code generation for simple expressions
    7. Implement backend of the compiler

    Additional Lab Questions:

    1. Program to find the Epsilon closure of all states of NFA

    The algorithms will be added to separate md file.

    Visit original content creator repository
    https://github.com/Pranavk-official/KTU-S7-CSE_CD-Lab

  • Headphones-Web

    Headphones Website

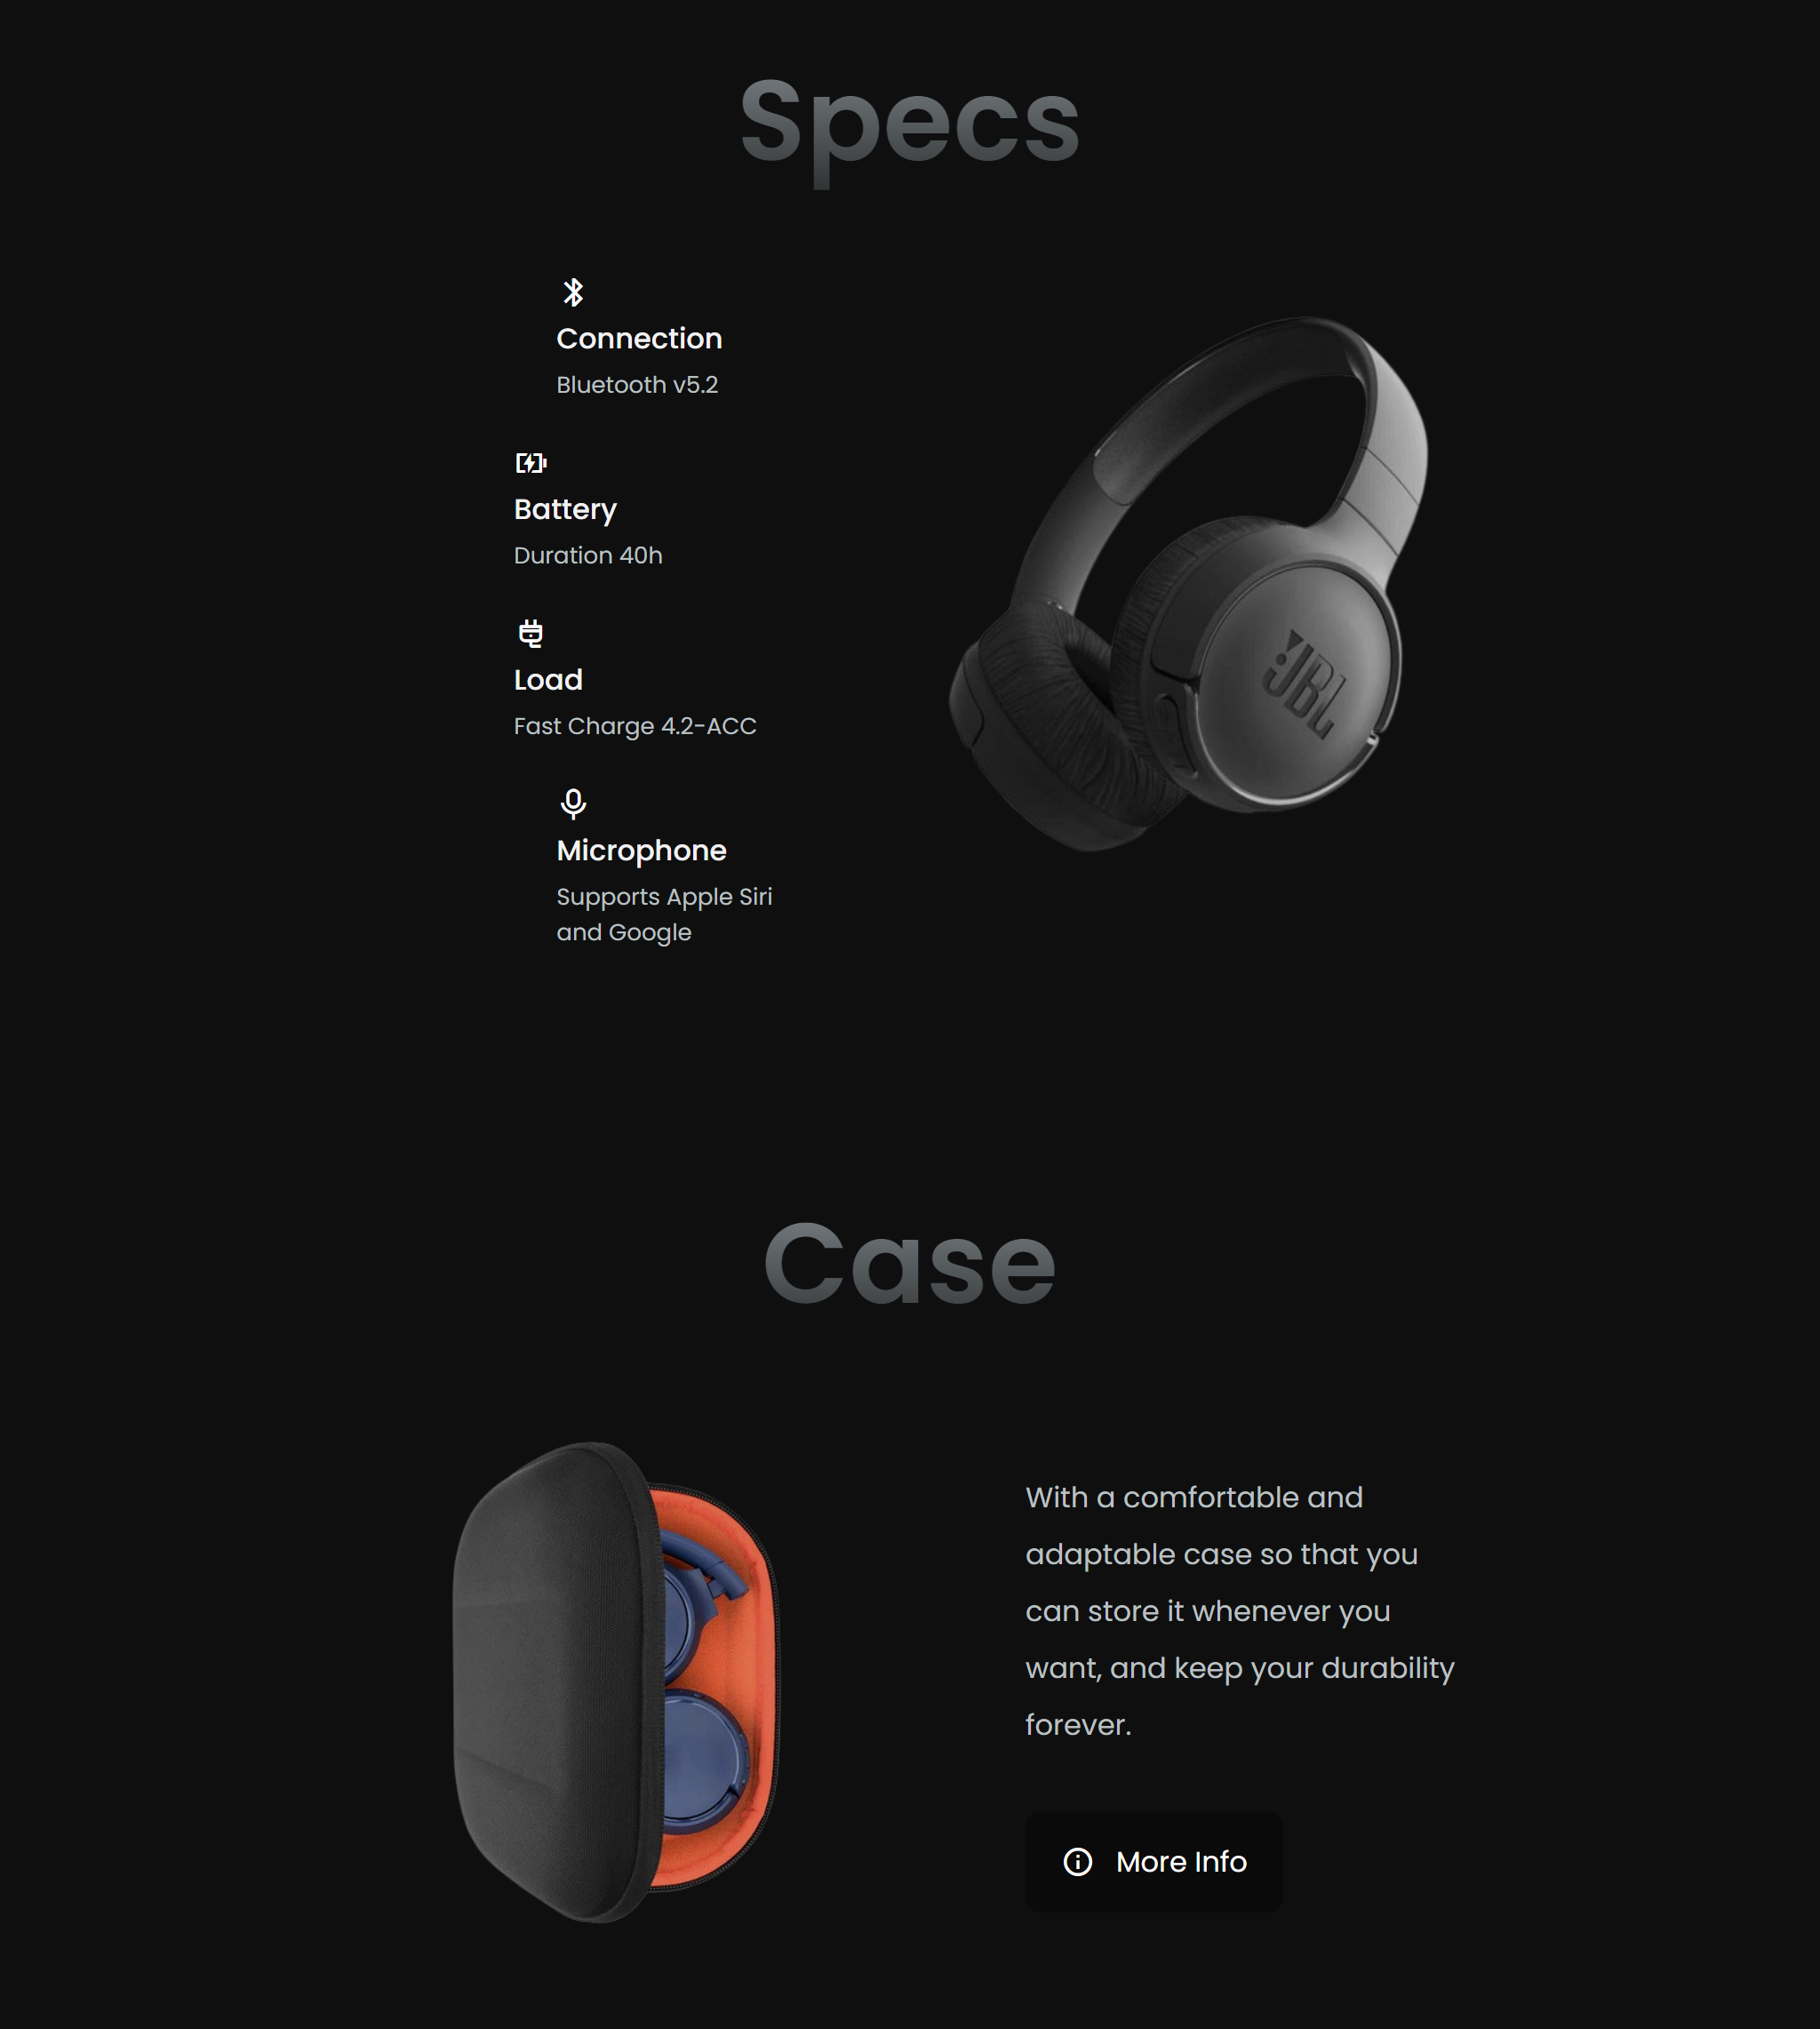
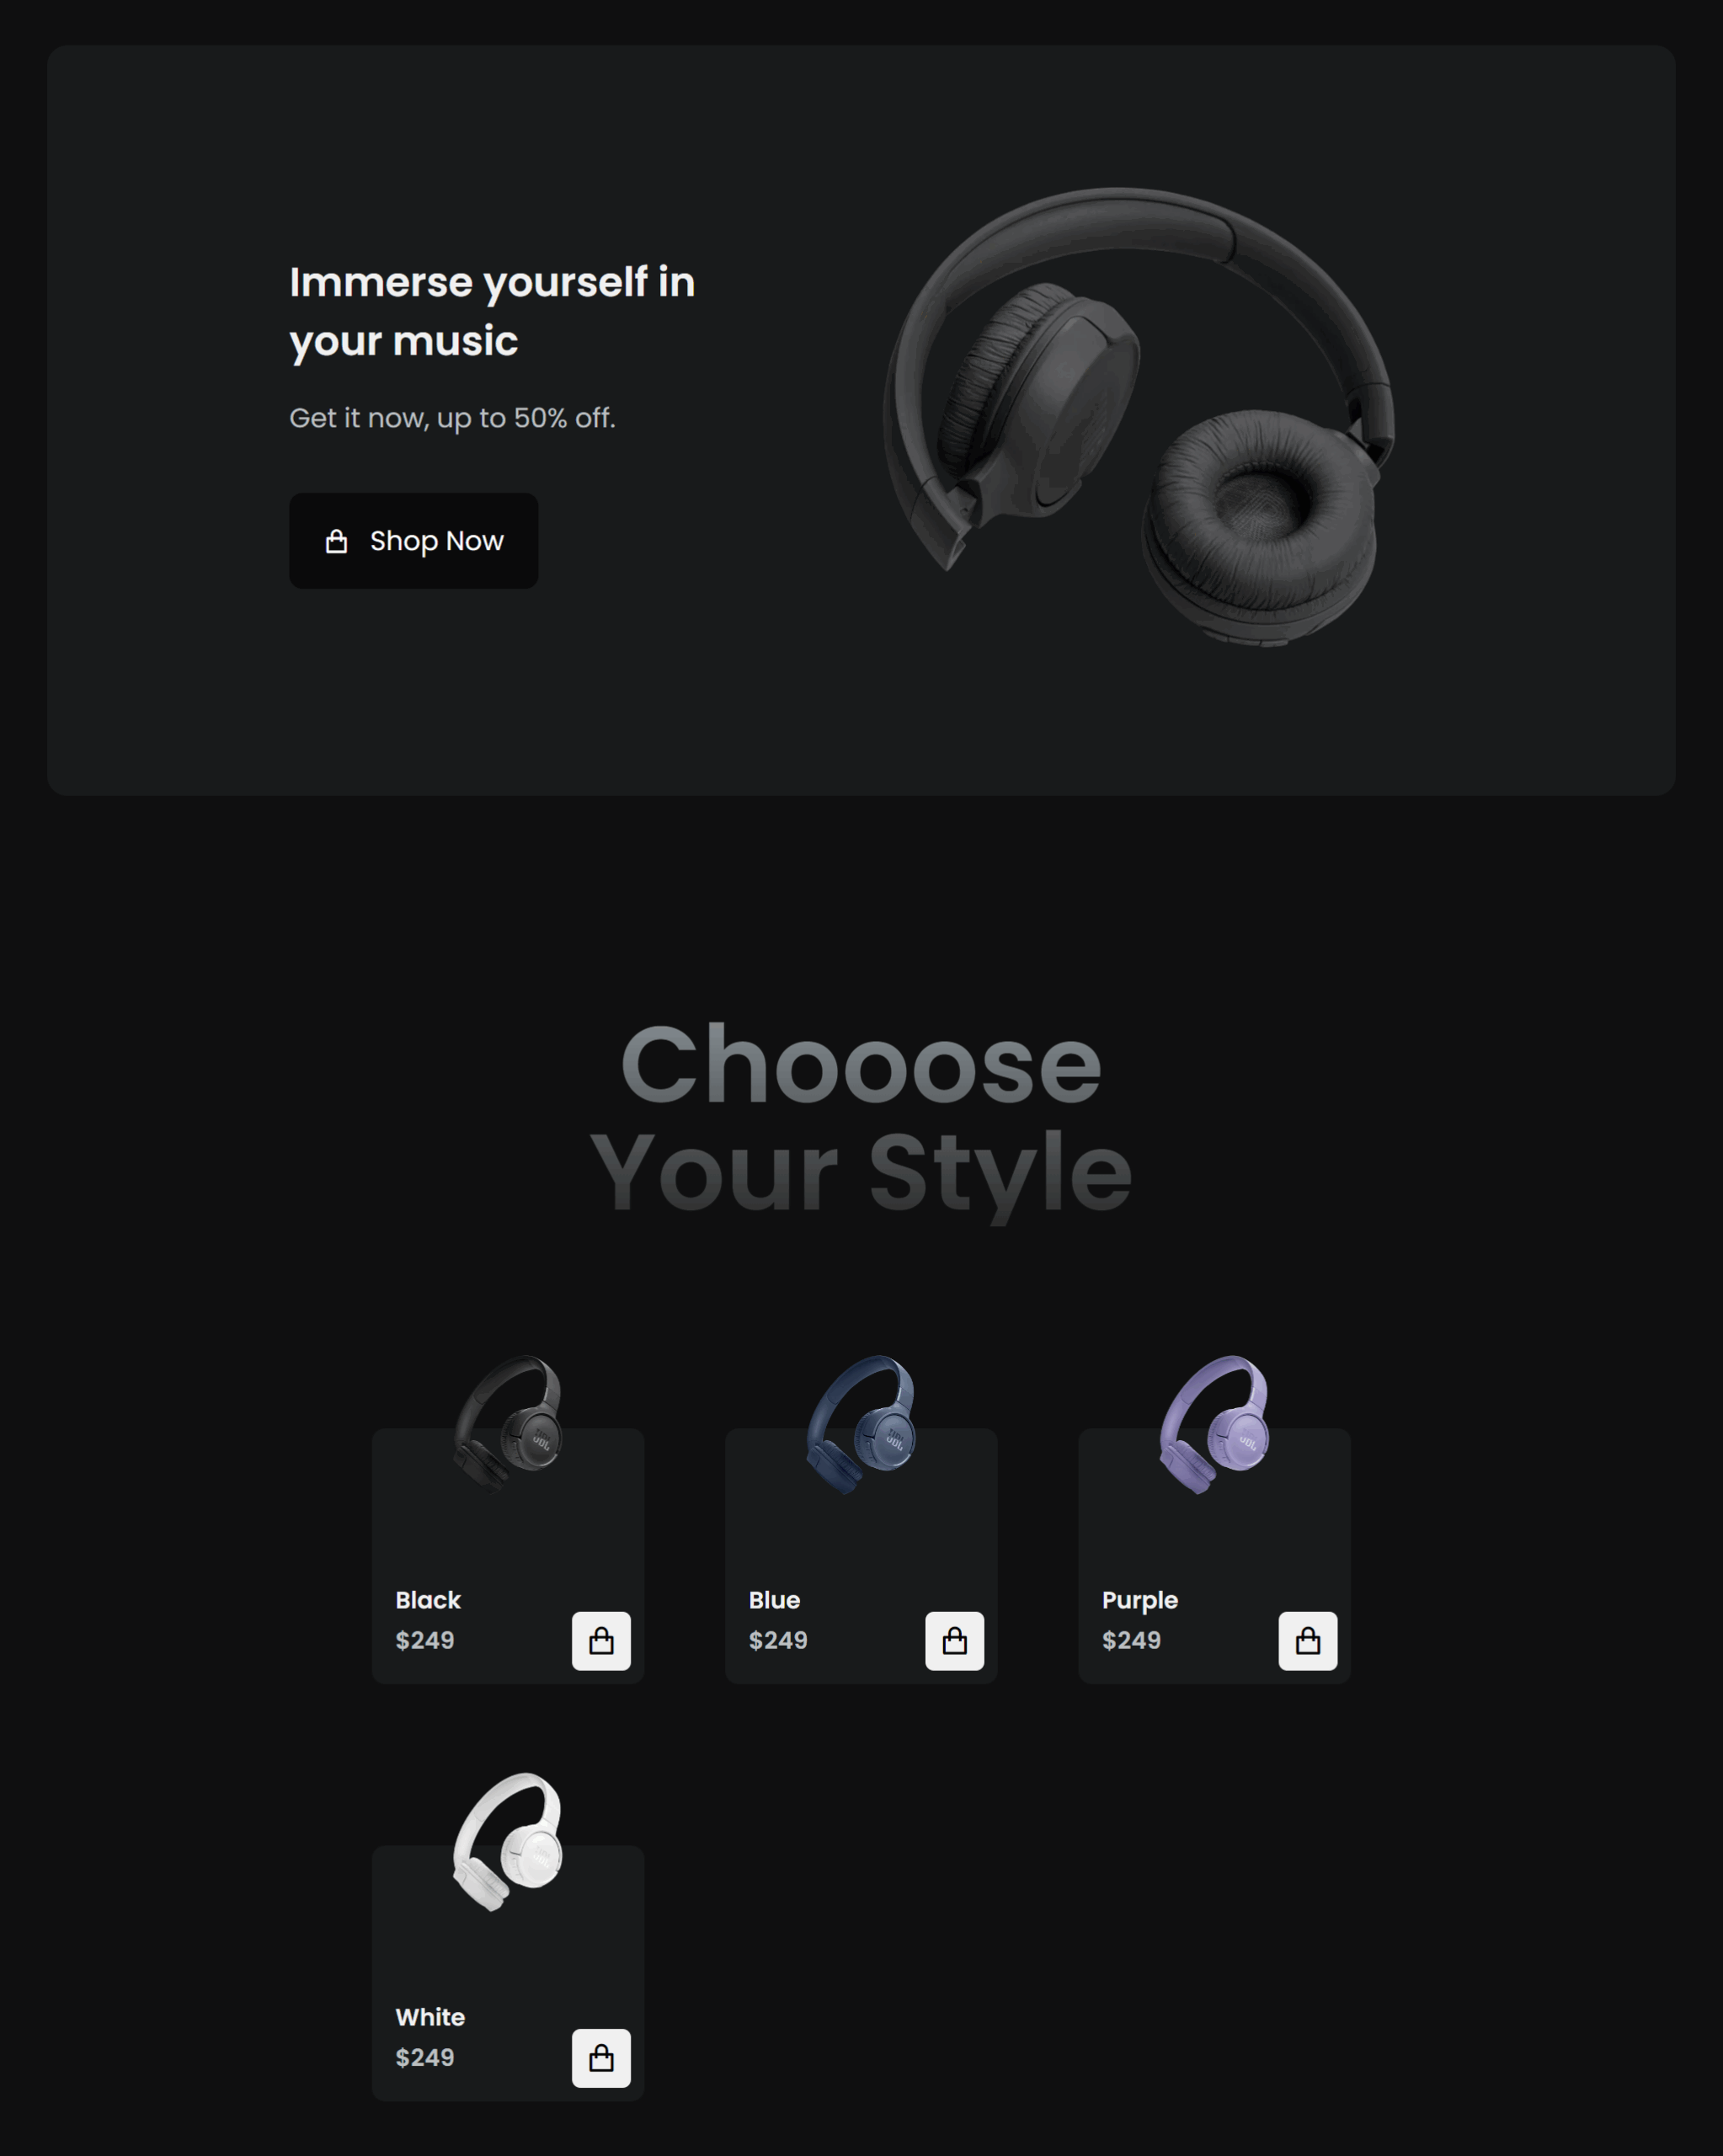
    This is a responsive website designed for the JBL headphone brand, showcasing various headphone models with their features, specifications, and prices. The project is built using HTML, CSS, and JavaScript.

    Screenshots

    Alt Text Alt Text Alt Text Alt Text

    Features

    • Responsive Design: The website is fully responsive, ensuring optimal display on devices of all sizes, including desktops, tablets, and mobile phones.
    • Interactive UI: Smooth transitions, animations, and user interactions using CSS and JavaScript.
    • Product Showcase: Different headphone models are showcased with images, descriptions, and prices.
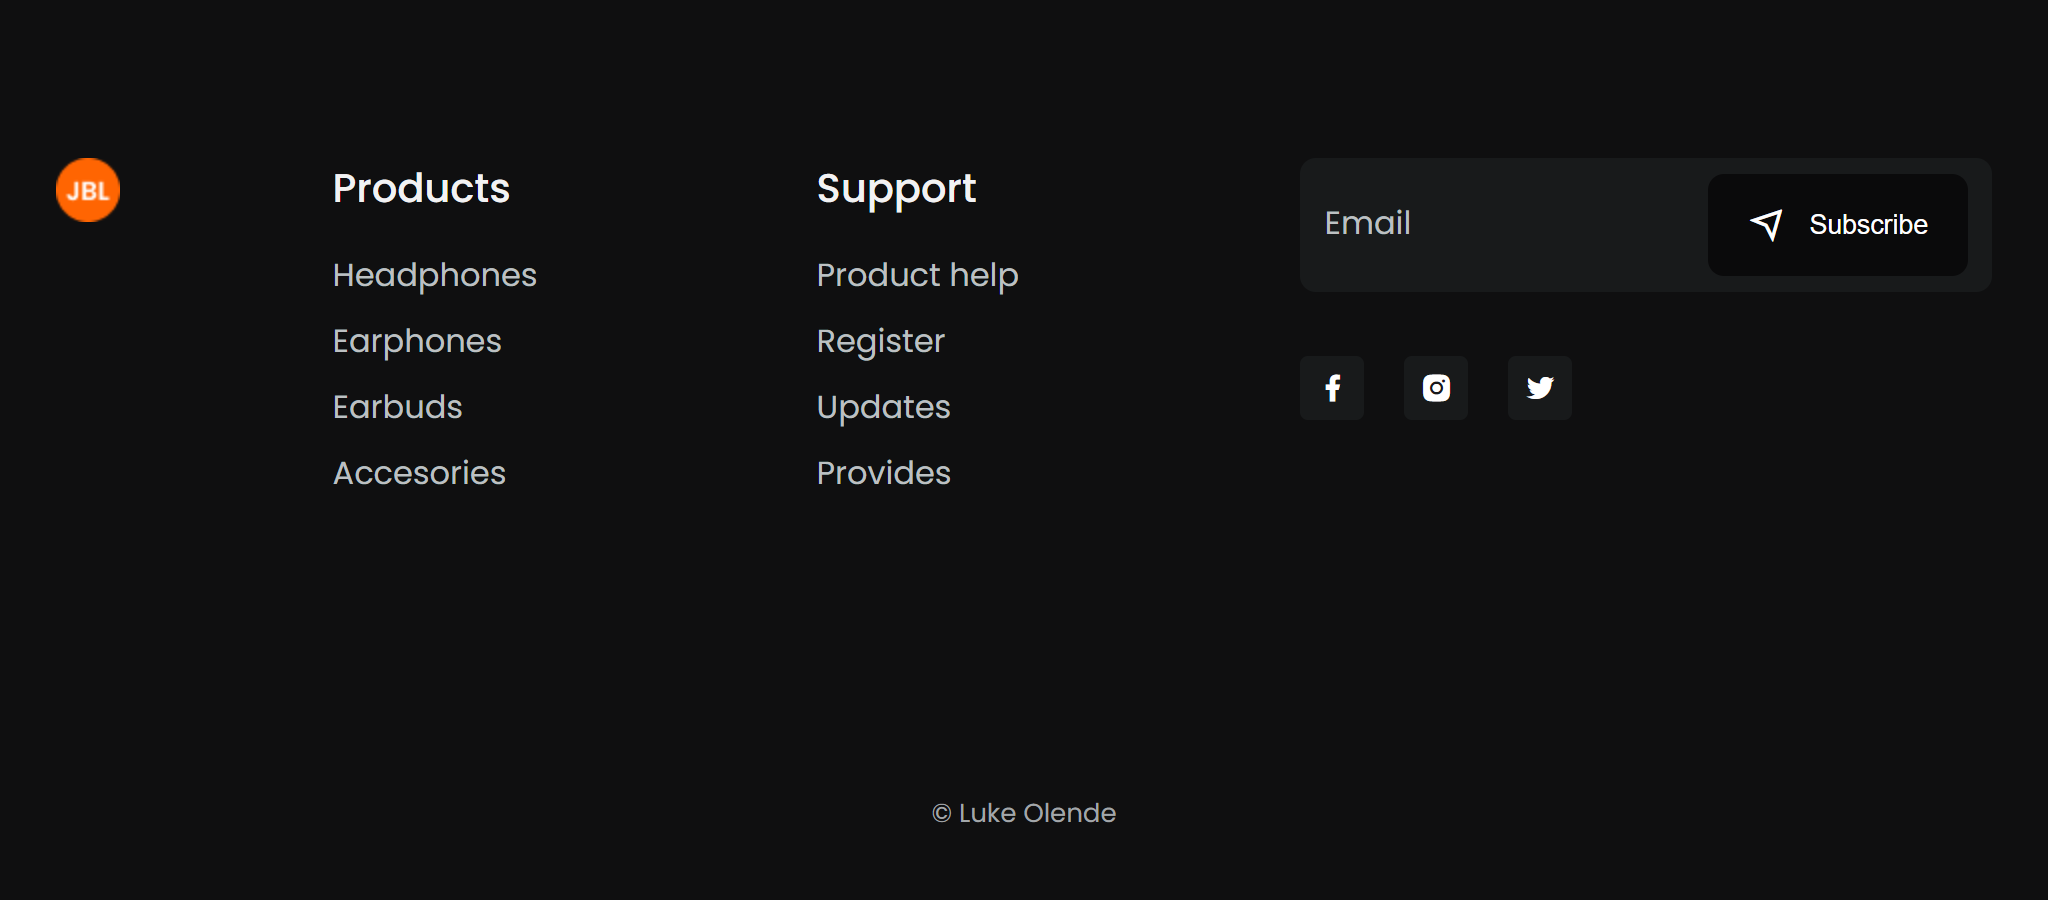
    • Navigation: Simple and intuitive navigation through the website.
    • Contact Section: A contact form for customer inquiries.

    Technologies Used

    • HTML5: Structuring the content of the website.
    • CSS3: Styling the website and ensuring responsiveness.
    • JavaScript: Adding interactivity to the website. Dynamic content update. Smooth scrolling and other UI enhancements

    Installation

    To run this project locally:

    1. Clone the repository: git clone https://github.com/Luk30lende/Headphones-Web.git

    2. Navigate to the project directory: cd Headphones-Web

    3. Open index.html in your browser

    Contributions

    Feel free to submit issues or pull requests if you would like to contribute to the project.

    License

    This project is licensed under the MIT License.

    Author

    Designed & developed by Luke Olende. Feel free to follow me on GitHub for more projects!

    Visit original content creator repository https://github.com/Luk30lende/Headphones-Web
  • glpi-agent

    GLPI Agent GLPI Agent

    GLPI Agent CI GLPI Agent Packaging Github All Releases Twitter Follow

    Summary

    The GLPI Agent is a generic management agent. It can perform a certain number of tasks, according to its own execution plan, or on behalf of a GLPI server acting as a control point.

    Description

    This agent is based on a fork of FusionInventory agent and so works mainly like FusionInventory agent. It introduces new features and a new protocol to communicate directly with a GLPI server and its native inventory feature. Anyway it also keeps the compatibility with FusionInventory for GLPI plugin.

    Download

    Documentation

    The GLPI Agent has its dedicated documentation project where any contribution will also be appreciated.

    The documentation itself is readable online.

    Documentation Status

    Dependencies

    Core

    Minimum perl version: 5.8

    Mandatory Perl modules:

    • File::Which
    • LWP::UserAgent
    • Net::IP
    • Text::Template
    • UNIVERSAL::require
    • XML::LibXML
    • Cpanel::JSON::XS

    Optional Perl modules:

    • Compress::Zlib, for message compression
    • HTTP::Daemon, for web interface
    • IO::Socket::SSL, for HTTPS support
    • LWP::Protocol::https, for HTTPS support
    • Proc::Daemon, for daemon mode (Unix only)
    • Proc::PID::File, for daemon mode (Unix only)

    Inventory task

    Optional Perl modules:

    • Net::CUPS, for printers detection
    • Parse::EDID, for EDID data parsing
    • DateTime, for reliable timezone name extraction

    Optional programs:

    • dmidecode, for DMI data retrieval
    • lspci, for PCI bus scanning
    • hdparm, for additional disk drive info retrieval
    • monitor-get-edid-using-vbe, monitor-get-edid or get-edid, for EDID data access
    • ssh-keyscan, for host SSH public key retrieval

    Network discovery tasks

    Mandatory Perl modules:

    • Thread::Queue

    Optional Perl modules:

    • Net::NBName, for NetBios method support
    • Net::SNMP, for SNMP method support

    Optional programs:

    • arp, for arp table lookup method support

    Network inventory tasks

    Mandatory Perl modules:

    • Net::SNMP
    • Thread::Queue

    Optional Perl modules:

    • Crypt::DES, for SNMPv3 support

    Wake on LAN task

    Optional Perl modules:

    • Net::Write::Layer2, for ethernet method support

    Deploy task

    Mandatory Perl modules:

    • Digest::SHA
    • File::Copy::Recursive
    • Cpanel::JSON::XS
    • URI::Escape

    Mandatory Perl modules for P2P Support:

    • Net::Ping
    • Parallel::ForkManager

    MSI Packaging

    Tools:

    Mandatory Perl modules:

    • Perl::Dist::Strawberry

    MacOSX Packaging

    Tools:

    Public databases

    Related contribs

    See CONTRIB to find references to GLPI Agent related scritps/files

    Contacts

    Project websites:

    Project Telegram channel:

    Please report any issues on project github issue tracker.

    Active authors

    Copyright 2006-2010 OCS Inventory contributors

    Copyright 2010-2019 FusionInventory Team

    Copyright 2011-2021 Teclib Editions

    License

    License: GPL v2

    This software is licensed under the terms of GPLv2+, see LICENSE file for details.

    Additional pieces of software

    The glpi-injector script is based on fusioninventory-injector script:

    • author: Pascal Danek
    • copyright: 2005 Pascal Danek

    GLPI::Agent::Task::Inventory::Vmsystem contains code from imvirt:

    Visit original content creator repository https://github.com/glpi-project/glpi-agent
  • imapcopy

    imapcopy

    Copy recursively all email messages and folders from one imap account to another

    Usage Instructions

    Run as a docker container: (recommended)

        docker run -it --name imapcopy jfisbein/imapcopy --source imap://peter:mypassword@foo.com --target imaps://peter%40gmail.com:myotherpasword@imap.gmail.com --fromDate 2018-02-01 --toDate 2019-01-01 --excluded Spam INBOX [Gmail] Spam Drafts Bin "Bart Simpson"        
    

    Run as a command line tool:

    • Download the application from the repository

    • build de jar:

        mvn clean package
      
    • Run the application:

        java -jar target/imapcopy-x.y.z.jar --source sourceImapAccount --target targetImapAccount --fromDate filterFromDate --toDate filterToDate --excluded [list of exlcuded folders]    
        (ex: java -jar target/imapcopy-1.1.0.jar --source imap://peter:mypassword@foo.com --target imaps://peter%40gmail.com:myotherpasword@imap.gmail.com --fromDate 2018-02-01 --toDate 2019-01-01 --excluded Spam INBOX [Gmail])
      

    Imap accounts url format

        {protocol}://[user:password@]{host}[:port]
    

    Where

    • protocol can be imap or imaps
    • user and password are optional and must be url escaped (ex: peter@gmail.com becomes peter%40gmail.com)
    • host: host of the imap server
    • port: port of the imap server

    Visit original content creator repository
    https://github.com/jfisbein/imapcopy

  • leetcode-leaderboardBackend

    LeetCode Leaderboard

    This project is a web application to track and display the performance of users on LeetCode. It includes features such as adding users, displaying a leaderboard, and viewing individual user profiles.

    Features

    • Leaderboard: Display a ranked list of users based on their LeetCode performance.
    • Add User: Add new users to the leaderboard by entering their LeetCode username.
    • User Profiles: View individual user profiles with a summary of their total questions solved.
    • Responsive Design: The application is fully responsive and works well on different screen sizes.

    Technologies Used

    • Frontend: React, React Router, Bootstrap
    • Backend: Flask, PostgreSQL
    • Styling: Custom CSS, Bootstrap

    Getting Started

    Prerequisites

    • Node.js and npm installed on your machine.
    • Python and pip installed on your machine.

    Installation

    1. Install frontend dependencies:

      git clone https://github.com/theinit01/leetcode-leaderboard-frontend.git
      cd leetcode-leaderboard-frontend
      npm install
    2. Install backend dependencies:

      git clone https://github.com/theinit01/leetcode-leaderboard-backend.git
      cd leetcode-leaderboard-backend
      pip install -r requirements.txt

    Running the Application

    1. Start the backend server:

      cd leetcode-leaderboard-backend
      flask run
    2. Start the frontend development server:

      cd cd leetcode-leaderboard-frontend
      npm start

    Configuration

    • Backend: The backend is a Flask server that handles API requests for fetching and adding users.
    • Frontend: The frontend is a React application that communicates with the backend server.

    Contributions

    Contributions are welcome! Please open an issue or submit a pull request for any improvements or bug fixes.
    Make commits to a new feature branch

    License

    This project is licensed under the MIT License. See the LICENSE file for details.

    Visit original content creator repository
    https://github.com/theinit01/leetcode-leaderboardBackend

  • tex-fmt

    tex-fmt tex-fmt

    CI crates.io Packaging status license: MIT

    An extremely fast LaTeX formatter written in Rust. Try it out now in your browser!

    Input Output
    \documentclass{article}
    
    \begin{document}
    
    \begin{itemize}
    \item Lists with items
    over multiple lines
    \end{itemize}
    
    \begin{equation}
    E = m c^2
    \end{equation}
    
    \end{document}
    \documentclass{article}
    
    \begin{document}
    
    \begin{itemize}
      \item Lists with items
        over multiple lines
    \end{itemize}
    
    \begin{equation}
      E = m c^2
    \end{equation}
    
    \end{document}
    • ⚡  Extremely fast run-time performance
    • 🔧  Minimal configuration required
    • 📟  Command line interface
    • 📜  Handles LaTeX file types .tex, .bib, .cls, and .sty
    • 🦀  Written entirely in safe Rust

    Installation

    Cargo

    Install the stable release with

    cargo install tex-fmt

    Install from GitHub with

    cargo install --git "https://github.com/wgunderwood/tex-fmt"

    Nix

    Install from nixpkgs into a temporary shell with

    nix-shell -p tex-fmt

    Build from source using flakes with

    nix build "github:wgunderwood/tex-fmt"

    Add to your NixOS installation with

    environment.systemPackages = [
      pkgs.tex-fmt
    ];

    It is also included in treefmt-nix.

    Arch Linux

    Install from the Arch User Repository. For example, using the yay AUR helper:

    yay -S tex-fmt

    Debian

    Install from the Debian archive (trixie and later):

    apt install tex-fmt

    Homebrew

    Install using Homebrew with

    brew install tex-fmt

    Binary download

    Binaries for various platforms are available on the GitHub releases page.

    Visual Studio Code

    Integration with VS Code is provided by the LaTeX Workshop extension. You will need to first install tex-fmt through one of the above methods.

    Neovim

    A package for Neovim is provided by mason.nvim.

    GitHub Action

    The tex-fmt-action can install and run tex-fmt.

    Usage

    The most commonly used options are given below. For a full list, see the options section below.

    tex-fmt file.tex                   # format file.tex and overwrite
    tex-fmt --check file.tex           # check if file.tex is correctly formatted
    tex-fmt --print file.tex           # format file.tex and print to stdout
    tex-fmt --recursive                # recursively format files in current directory
    tex-fmt --recursive dir/           # recursively format files in dir
    tex-fmt --fail-on-change file.tex  # format file.tex and return exit-code 1 if overwritten
    tex-fmt --nowrap file.tex          # do not wrap long lines
    tex-fmt --stdin                    # read from stdin and print to stdout
    tex-fmt --help                     # view help information

    Configuration

    Options can also be read from a configuration file, which will be read from the following locations, in order of decreasing priority.

    • A named config file passed as tex-fmt --config <PATH>
    • A file named tex-fmt.toml in the current working directory
    • A file named tex-fmt.toml in the root directory of the current git repository
    • A file named tex-fmt.toml in a subdirectory titled tex-fmt/ in the user’s configuration directory
      • Linux: ~/.config/tex-fmt/tex-fmt.toml
      • macOS: /Users/<user>/Library/Application Support/tex-fmt/tex-fmt.toml
      • Windows: C:\Users\<user>\AppData\Roaming\tex-fmt\tex-fmt.toml

    Arguments passed on the command line will always override those specified in configuration files. An example configuration file is available at tex-fmt.toml. To ignore all config files, use the --noconfig flag.

    Note for contributors: this repository’s configuration file will be automatically applied if tex-fmt is run from within the repository. Use --noconfig or --config <PATH> to avoid this.

    Disabling the formatter

    Ending a source line with % tex-fmt: skip disables formatting for that line. To disable the formatter for a block, use % tex-fmt: off and % tex-fmt: on.

    \documentclass{article}
    
    \begin{document}
    
        This line is skipped % tex-fmt: skip
    
    % tex-fmt: off
      These lines are also
        not formatted or wrapped
    % tex-fmt: on
    
    \end{document}

    Verbatim environments including verbatim, Verbatim, lstlisting and minted are automatically skipped.

    Ignoring files in recursive mode

    Recursive searches with --recursive or -r will ignore patterns in .gitignore and .ignore files, following git conventions.

    Shell completion

    Shell completion scripts can be generated at run-time using the --completion <SHELL> flag. See the completion directory for more details.

    Man page

    A man page can be generated at run-time using the --man flag. See the man directory for more details.

    Pre-commit hook

    tex-fmt can be run before every git commit using pre-commit with the following .pre-commit-config.yaml in your repository root:

    repos:
      - repo: https://github.com/WGUNDERWOOD/tex-fmt
        rev: v0.5.5
        hooks:
          - id: tex-fmt

    To prevent the pre-commit hook from modifying your files, add:

          - id: tex-fmt
            args: [--check]

    Performance

    When formatting all of the test cases, tex-fmt is over a thousand times faster than latexindent.

    Files Lines Size tex-fmt latexindent latexindent -m
    51 94k 3.5M 0.055s 106s [x1927] 127s [x2309]

    Contribution

    Please feel free to open an issue or submit a pull request, including as much information as you can. Documentation of internals can be accessed by cloning this repository and running cargo doc, or by visiting the docs.rs page.

    Alternatively, you can Buy Me a Coffee!

    Limitations

    • Semantic parsing of LaTeX code not conducted
    • No linting or correction of syntax errors
    • Compliance with existing formatting guidelines not guaranteed
    • No spelling or grammar checking

    Existing tools

    • latexindent. Perl script, many configuration options, slow on large files

    • bibtex-tidy. JavaScript program, specifically for BibTeX files

    • LaTeXTidy. Perl script, download links seem to be broken

    • latex-pretty. Browser-based, uses latexindent as the backend

    • latexformat.com. Browser-based

    • texpretty. C program which works sometimes and appears to be fast

    • latex-editor. Browser-based

    • LaTeXFmt. Vim plugin, does not apply indentation

    • latex-formatter. Visual Studio plugin, uses latexindent as the backend

    • LLF. Lua script, many configuration options

    Options

    Command line options

    The following arguments can be passed on the command line.

    Option Alias Default Description
    --check -c Check formatting, do not modify files
    --print -p Print to stdout, do not modify files
    --fail-on-change -f Fail if files are modified
    --recursive -r Recursively search for files to format
    --nowrap -n Do not wrap long lines
    --wraplen <N> -l 80 Line length for wrapping
    --tabsize <N> -t 2 Number of characters to use as tab size
    --usetabs Use tabs instead of spaces for indentation
    --stdin -s Process stdin as a single file, output to stdout
    --config <PATH> Path to config file
    --noconfig Do not read any config file
    --verbose -v Show info messages
    --quiet -q Hide warning messages
    --trace Show trace messages
    --completion <SHELL> Generate a shell completion script
    --man Generate a man page
    --args View arguments passed to tex-fmt
    --help -h Print help
    --version -V Print version

    Configuration file options

    The following arguments can be provided in tex-fmt.toml. The first example in each row is the default value.

    Option Type Examples Description
    check bool false Check formatting, do not modify files
    print bool false Print to stdout, do not modify files
    fail-on-change bool false Fail if files are modified
    wrap bool true Wrap long lines
    wraplen int 80, 100 Line length for wrapping
    wrapmin int 70, 90 Target minimum length for line wrapping
    tabsize int 2, 4 Number of characters to use as tab size
    tabchar str "space", "tab" Character to use for indentation
    stdin bool false Process stdin as a single file, output to stdout
    lists arr[str] [], ["myitemize"] Extra list environments to be formatted as itemize
    verbatims arr[str] [], ["myverbatim"] Extra verbatim environments
    no-indent-envs arr[str] [], ["mydocument"] Environments which are not indented
    wrap-chars arr[str] [], ["。"] Characters after which lines may be wrapped
    verbosity str "warn", "error" Verbosity level for terminal logging
    Visit original content creator repository https://github.com/WGUNDERWOOD/tex-fmt
  • wc-dl-pl

    #Woocommerce Datil plugin 😀 by me.

    WordPress plugin or theme development with Docker Compose

    Build status

    This is an example repo for how one might wire up Docker Compose with the chriszarate/wordpress image for plugin or theme development. In addition to WP-CLI, PHPUnit, Composer, Xdebug, and the WordPress unit testing suite, the docker-compose.yml file adds MariaDB and nginx-proxy to create a complete development environment that starts quickly.

    Set up

    1. Clone or fork this repo.

    2. Put your plugin or theme code in the root of this folder and adjust the services/wordpress/volumes section of docker-compose.yml so that it syncs to the appropriate directory.

      If you would like your plugin or theme activated when the container starts, edit the WORDPRESS_ACTIVATE_PLUGINS or WORDPRESS_ACTIVATE_THEME environment variables.

    3. Add project.test (or your chosen hostname) to /etc/hosts, e.g.:

      127.0.0.1 localhost project.test
      

      If you choose a different hostname, edit .env as well.

    Start environment

    docker-compose up -d

    The first time you run this, it will take a few minutes to pull in the required images. On subsequent runs, it should take less than 30 seconds before you can connect to WordPress in your browser. (Most of this time is waiting for MariaDB to be ready to accept connections.)

    The -d flag backgrounds the process and log output. To view logs for a specific container, use docker-compose logs [container], e.g.:

    docker-compose logs wordpress

    Please refer to the Docker Compose documentation for more information about starting, stopping, and interacting with your environment.

    Log in to /wp-admin/ with wordpress / wordpress.

    Update environment

    To pull in the latest images (including chriszarate/wordpress), make sure your clone/fork of this repo is up to date, then run the following commands. Note that this will destroy your current environment, including the database, and reset it to its initial state.

    docker-compose down
    docker-compose pull
    docker-compose up -d

    WP-CLI

    You will probably want to [create a shell alias][3] for this:

    docker-compose exec --user www-data wordpress wp [command]

    Running tests (PHPUnit)

    The tests in this example repo were generated with WP-CLI:

    docker-compose exec --user www-data wordpress wp scaffold plugin-tests my-plugin

    This is not required, however, and you can bring your own test scaffold. The important thing is that you provide a script to install your test dependencies, and that these dependencies are staged in /tmp.

    The testing environment is provided by a separate Docker Compose file (docker-compose.phpunit.yml) to ensure isolation. To use it, you must first start it, then manually run your test installation script. These commands work for this example repo, but may not work for you if you use a different test scaffold (note that, in this environment, your code is mapped to /app):

    docker-compose -f docker-compose.yml -f docker-compose.phpunit.yml up -d
    docker-compose -f docker-compose.phpunit.yml run --rm wordpress_phpunit /app/bin/install-wp-tests.sh wordpress_test root '' mysql_phpunit latest true

    Now you are ready to run PHPUnit. Repeat this command as necessary:

    docker-compose -f docker-compose.phpunit.yml run --rm wordpress_phpunit phpunit

    Xdebug

    Xdebug is installed but needs the IP of your local machine to connect to your local debugging client. Edit .env and populate the DOCKER_LOCAL_IP environment variable with your machine’s (local network) IP address. The default idekey is xdebug.

    You can enable profiling by appending instructions to XDEBUG_CONFIG in docker-compose.yml, e.g.:

    XDEBUG_CONFIG: "remote_host=${DOCKER_LOCAL_IP} idekey=xdebug profiler_enable=1 profiler_output_name=%R.%t.out"
    

    This will output cachegrind files (named after the request URI and timestamp) to /tmp inside the WordPress container.

    Seed MariaDB database

    The mariadb image supports initializing the database with content by mounting a volume to the database container at /docker-entrypoint-initdb.d. See the MariaDB Docker docs for more information.

    Seed wp-content

    You can seed wp-content with files (e.g., an uploads folder) by mounting a volume to the wordpress container at /tmp/wordpress/init-wp-content. Everything in that folder will be copied to your installation’s wp-content folder.

    Visit original content creator repository https://github.com/Bernix01/wc-dl-pl
  • pixelserv-tls-pihole

    Visit original content creator repository
    https://github.com/SidingsMedia/pixelserv-tls-pihole

  • dash-VolvoS80

    Dash_VolvoS80

    This repo contains a Vehicle Plugin for Dash to support a 2004 Volvo S80 with a D5 engine.

    Current functionality:

    • Use steering wheel buttons in Android Auto
    • Button page for Trunk, open/close all windows (currently only front passenger window does anything lmao)
      and a gauge sweep
    • Automatic switching to reverse camera when reverse gear is engaged
    • Data page (speed, rpm and reverse status are currently working)

    TODO:

    • Change canbus id-s for gauges and exchange speed for boost
    • Integrate parking sensors
    • Webasto heater control (preferably with a microcontroller to enable remote webasto controll over the internet while minimizing power usage but also integrating the control panel in dash)
    • Add wheel button combos (for example pressing cruise control- and vol- changes the page in Dash)
    • Fix bugs on the vehicle page (only shows one door open at a time and shows it repeatedly opening/closing)
    • Fix swtiching between pages (currently as long as reverse is engaged it forces the camera page)
    • integrate light status in the vehicle page
    • Change opendash source code to display rpm, speed etc on the gauges page instead

    Layout (currently they only interface with the Android Auto Page):

    • RTI dpad – acts like a dpad
    • Enter and Back above dpad – Enter and Back
    • NEXT and PREV – NEXT and PREV
    • Call accept – PLAY/PAUSE
    • Call deny – Call deny

    This repo also contains a .txt file with the candump output of different canbus buttons.

    For me the easiest location to tap into the low speed canbus was in the trunk from the stock RTI connector.

    Based on Dash_InfinitiG37

    Visit original content creator repository
    https://github.com/andreastpt/dash-VolvoS80

  • ngrev

    ngrev

    ngrev

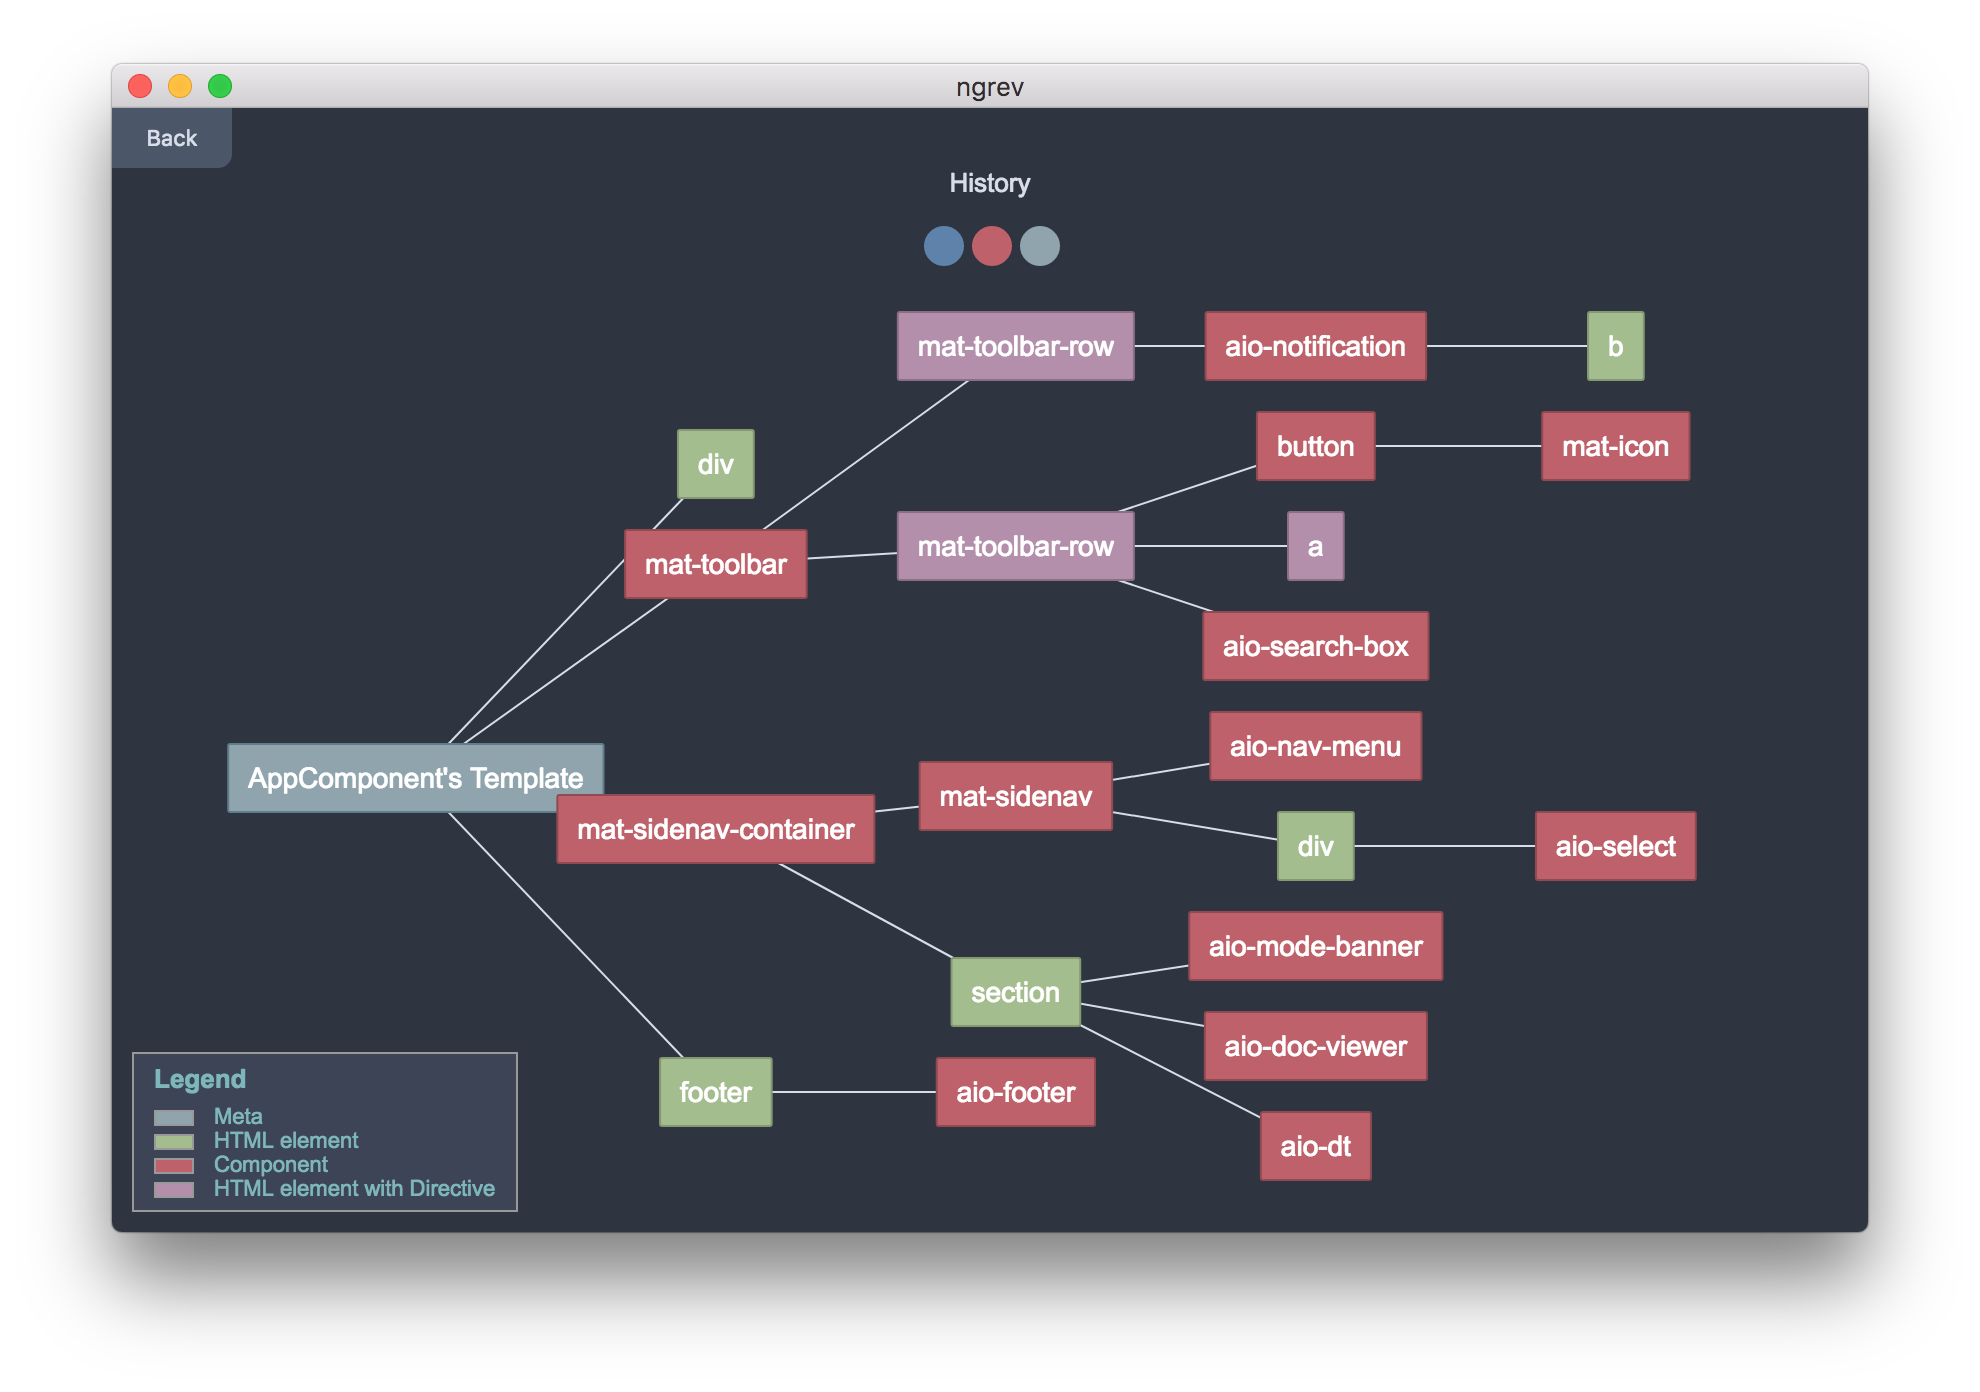
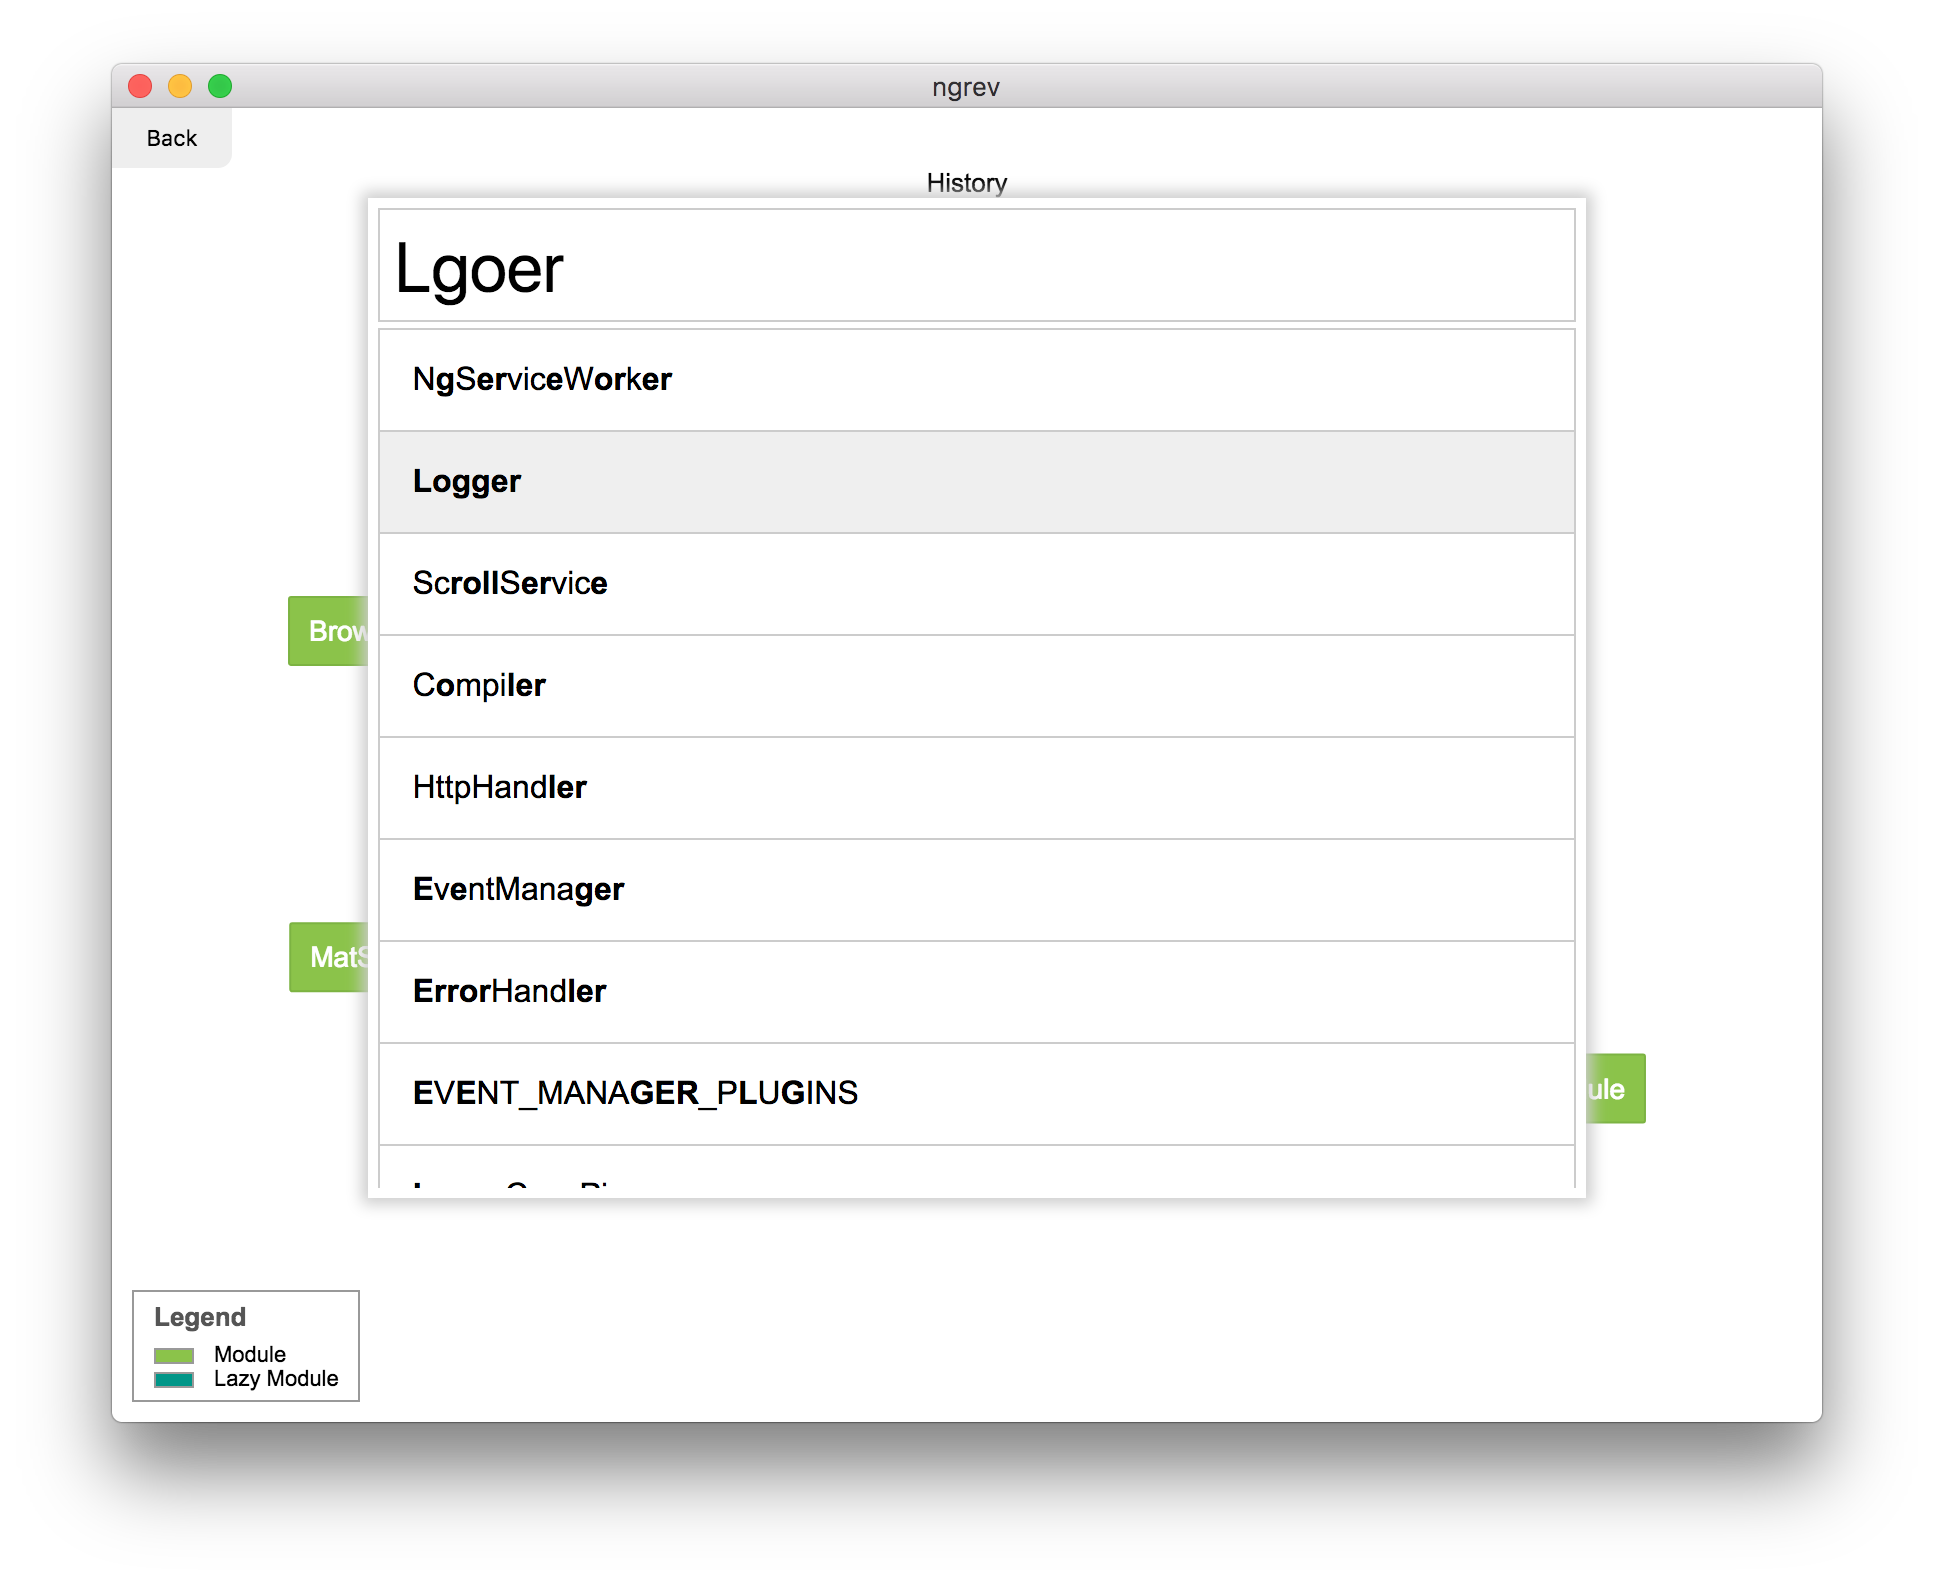
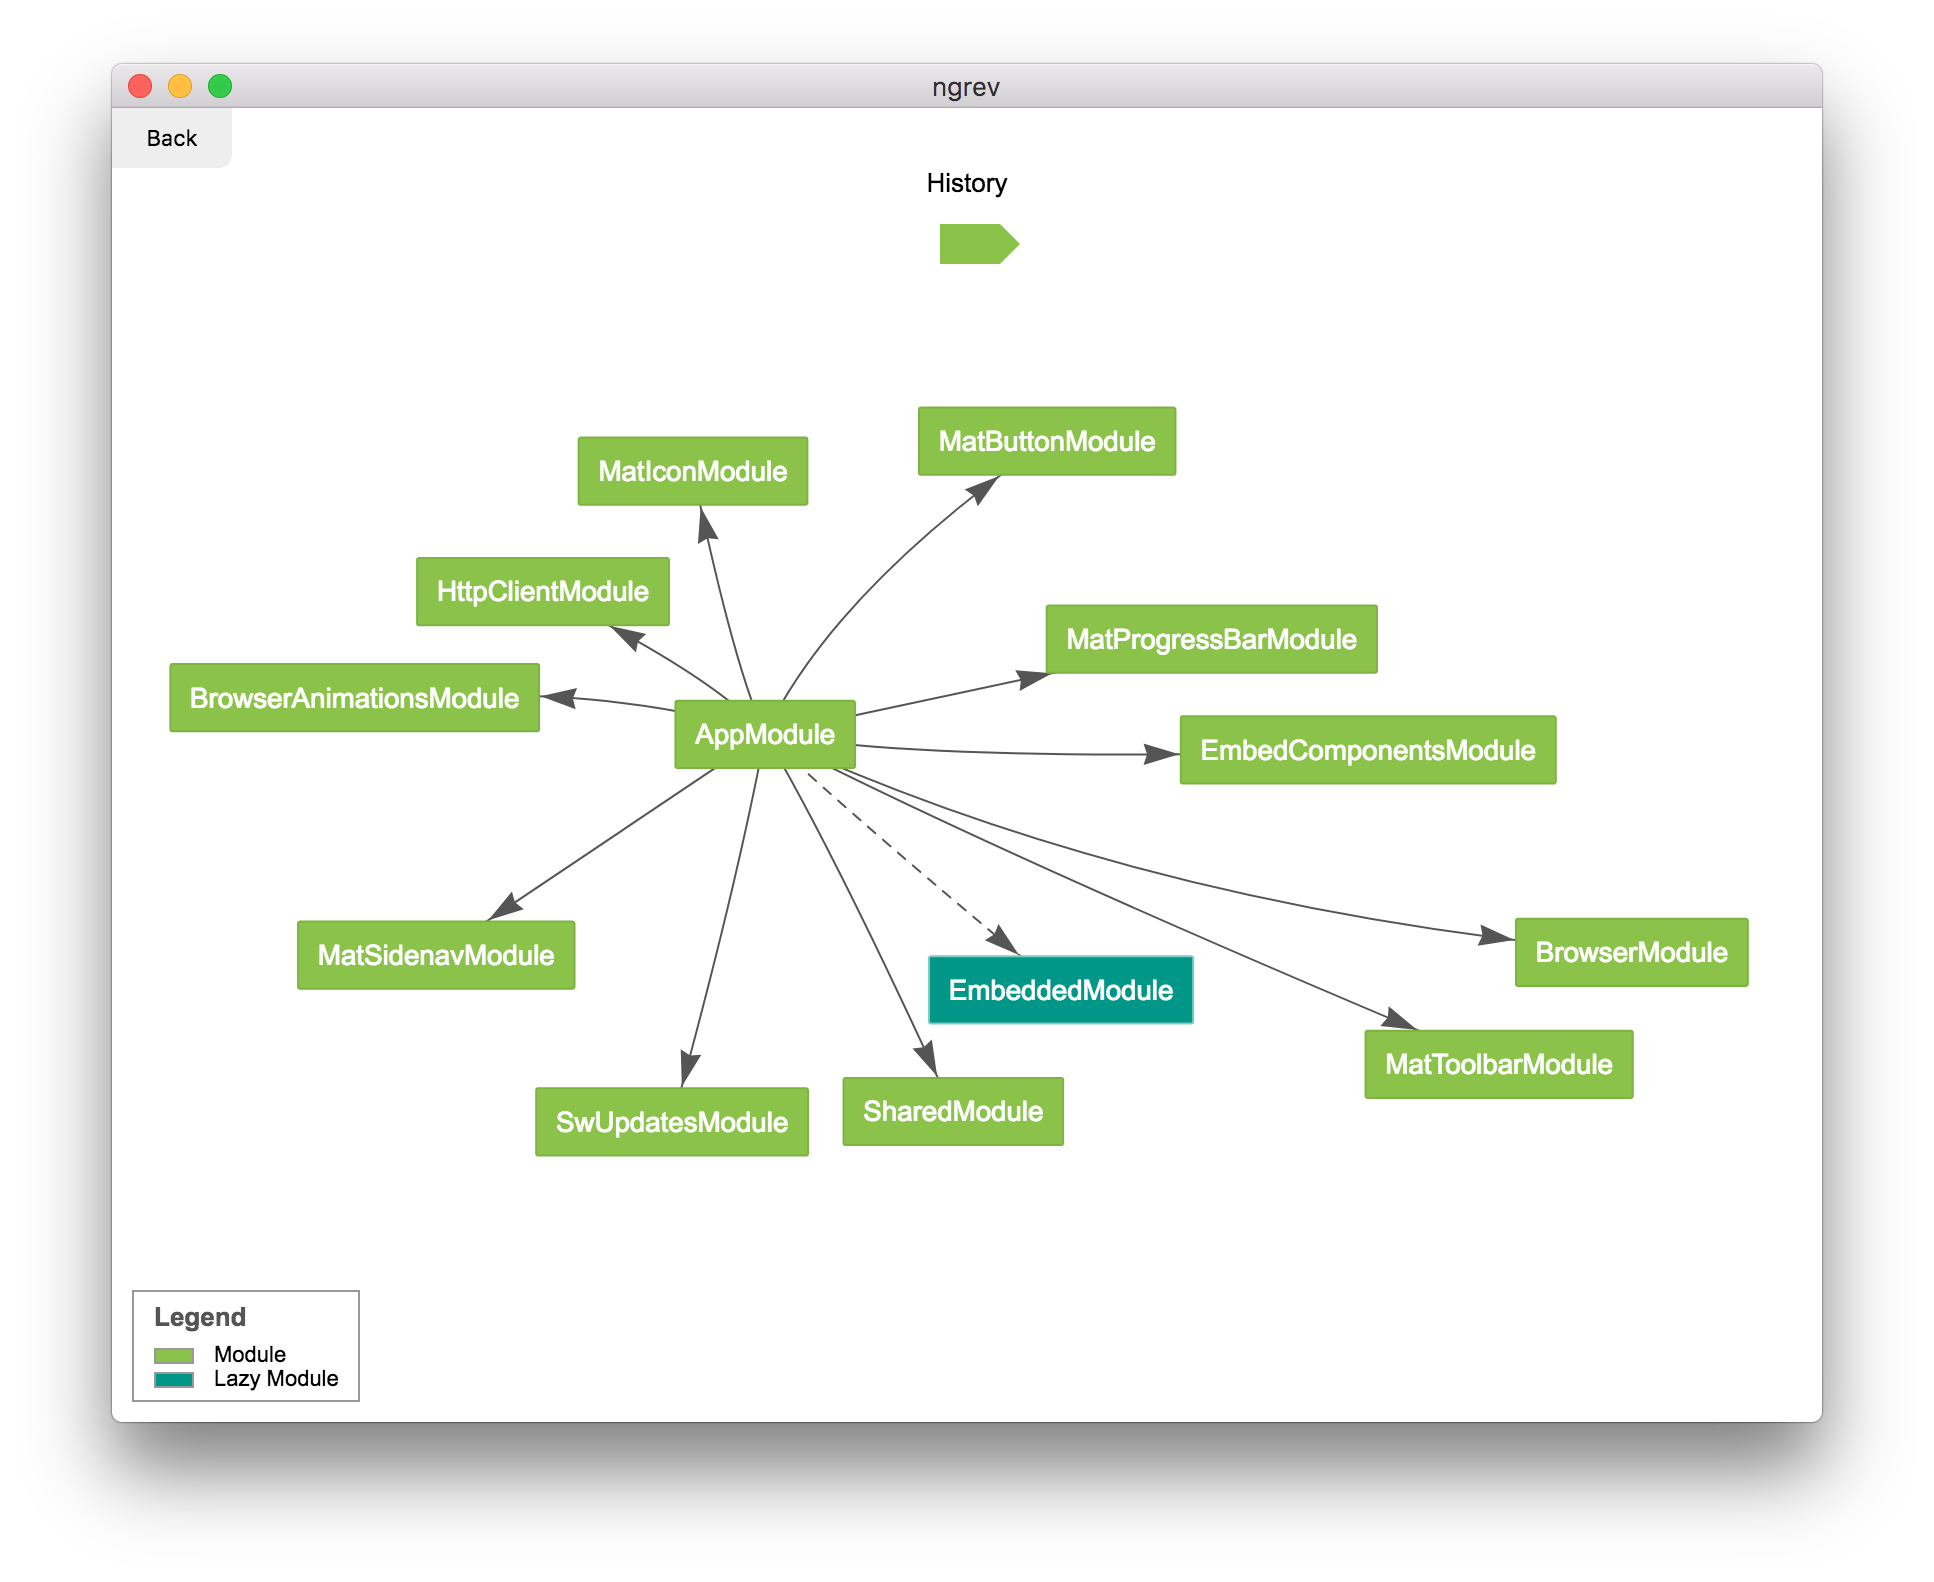
    Graphical tool for reverse engineering of Angular projects. It allows you to navigate in the structure of your application and observe the relationship between the different modules, providers, and directives. The tool performs static code analysis which means that you don’t have to run your application in order to use it.

    ngrev is not maintained by the Angular team. It’s a side project developed by the open source community.

    How to use?

    macOS

    1. Go to the releases page.
    2. Download the latest *.dmg file.
    3. Install the application.

    The application is not signed, so you may have to explicitly allow your mac to run it in System Preferences -> Security & Privacy -> General.

    Linux

    1. Go to the releases page.
    2. Download the latest *.AppImage file.
    3. Run the *.AppImage file (you may need to chmod +x *.AppImage).

    Windows

    1. Go to the releases page.
    2. Download the latest *.exe file.
    3. Install the application.

    Creating a custom theme

    You can add your own theme by creating a [theme-name].theme.json file in Electron [userData]/themes. For a sample theme see Dark.

    Application Requirements

    Your application needs to be compatible with Angular Ivy compiler. ngrev is not tested with versions older than v11. To stay up to date check the update guide on angular.io.

    Using with Angular CLI

    1. Open the Angular’s application directory.
    2. Make sure the dependencies are installed.
    3. Open ngrev.
    4. Click on Select Project and select [YOUR_CLI_APP]/src/tsconfig.app.json.

    Demo

    Demo here.

    Component template

    Themes

    Command + P

    Module Dependencies

    Release

    To release:

    1. Update version in package.json.
    2. git commit -am vX.Y.Z && git tag vX.Y.Z
    3. git push && git push --tags

    Contributors

    mgechev vik-13
    mgechev vik-13

    License

    MIT

    Visit original content creator repository https://github.com/mgechev/ngrev